How To Tie A Stopper Knot
The end of a lariat-type of rope needs a "stopper knot" to keep the rope from unraveling.
If the roper is using a metal, rawhide, or plastic honda, a stopper knot also serves to hold the honda in place.
This article covers how to tie a Matthew Walker stopper knot, a type of stopper knot commonly used for both of the purposes mentioned above.
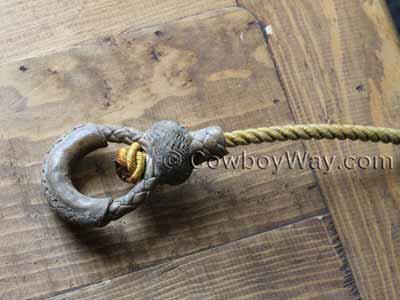
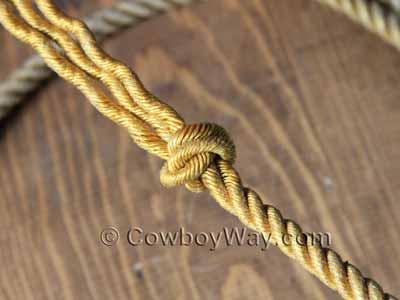
Below: A three-strand Matthew Walker knot being used to keep the end of the rope from unraveling, and to keep a rawhide honda in place. (Slide the honda on the rope first, then the knot.)
Since there are several variations of the Matthew Walker knot, it's worth mentioning this article covers how to tie a three-strand Matthew Walker knot. The three-stand Matthew Walker knot is secure, not too small but not too bulky, and pleasing to look at.
Tie A Matthew Walker Stopper Knot
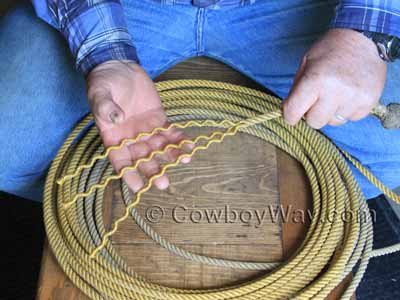
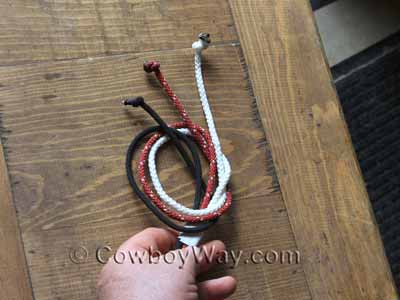
Begin by unraveling several inches of the end of your rope. In the photo below the rope was unraveled about eight inches, which is more than enough.
For the next few photos we have switched to using three strands of differently-colored nylon cord instead of the rope shown above. Using the different colors of the cord made the photographs easier to understand.
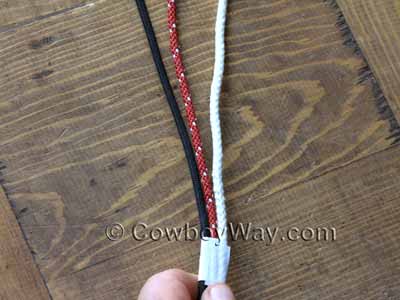
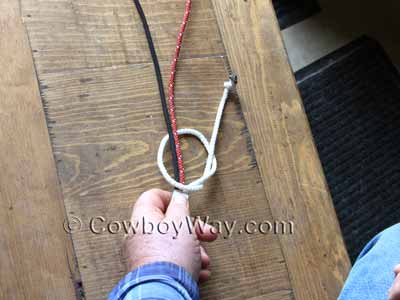
Begin by taking the right-hand side strand (white):
- behind the other two strands (red and black)
- then across the front of the rope
- then up through the loop that it makes.
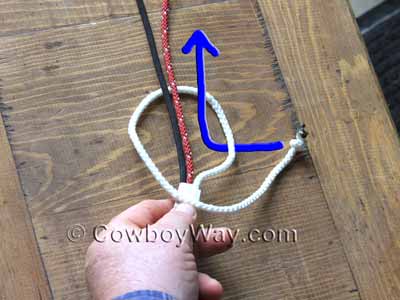
This should be the result.
Now take the middle strand (red):
- behind the third strand (black)
- then across the front of the rope
- then up through the loop previously made by the white strand, and also its own (red) loop
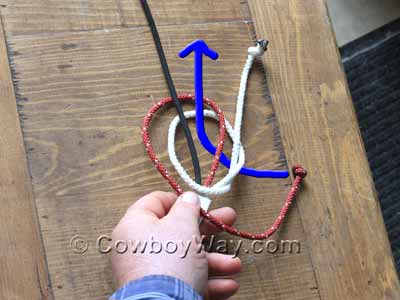
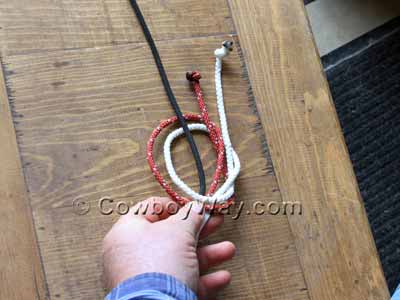
This should be the result.
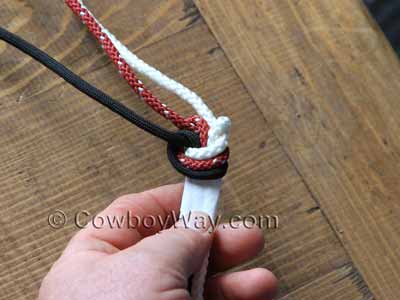
Now take the remaining strand (black):
- across the front of the rope
- then up through the loops previously made by the white and red strands, and also its own (black) loop
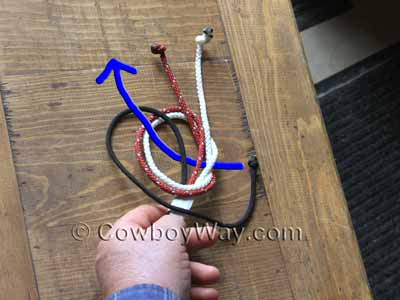
This should be the result. When looking at the bottom of the loops, notice that the strands are in order (first strand on top, middle strand in the center, third strand on the bottom).
To tighten, pull the first strand a little tighter, then the second strand, then the third. Work with the natural twist of each strand to help it lie flat and neat. Continue to tighten the knot slowly, tightening each strand a little bit at a time.
For now, keep the strands in order when looking at the bottom of the knot (first strand on top, middle strand in the center, third strand on the bottom). You can see this order in the photo below.
As the knot starts to become tight, the bottom and middle strands will want to roll upward. At this stage that's what you want and you can even help them by gently pushing them upward with your fingers.
This is the tightened knot. After we took this photo we cut the strands off to about 1/4 inch in length, then melted them with a candle. The finished knot is shown in the first photo at the top of this page. (Note: The honda was slid onto the rope first, then the knot was tied.)
Like many knots, the three-strand Matthew Walker knot isn't difficult to tie, but can easily be ruined if you pull it tight incorrectly.
Since it may take a little practice to learn to tighten this knot correctly - and since it can be difficult to untie - it might be a good idea to practice on some cord, or an old rope, before you tie it on one of your good ropes.
About Matthew Walker
To the best of our knowledge, the origins of the Matthew Walker knot are not certain. However, the popular book "The Ashley Book of Knots," by Clifford Ashley, contains the following information regarding the origins of this knot.
"A sailor, having been sentenced to death by a judge who in earlier life had been a sailor himself, was reprieved by the judge because of their common fellowship of the sea. The judge offered the sailor a full pardon if he could show him a knot that he, the judge, could neither tie nor untie.
The sailor called for ten fathoms of rope and, having retired to the privacy of his cell, unlaid the rope halfway, put in a Matthew Walker knot, and then laid up the rope again to the end.
So Matthew Walker secured his pardon, and the world gained an excellent knot."
How To...
… Care For Your Felt Cowboy Hat
… Care For Your Saddle Pad Or Blanket
… Close A Gate With A Chain Latch
… Estimate Cattle Age By Their Teeth
… Fishtail Braid Your Horse's Tail
… Make A Bridle Rack Out Of Tin Cans
… Make A Collapsible Wood Saddle Rack
… Make A Flag Boot Out Of A Horn
… Make Homemade Hoof Conditioner
… Make Homemade Horse Fly Spray
… Measure A Western Saddle Seat
… Put A Horn Knot On Your Rope
… Put A Speed Burner On A Honda
… Recognize Common Horse Colors
… Recognize Common Horse Face Markings
… Stop A Saddle From Squeaking
… Tell A Boy Cow From A Girl Cow
… Tell A Horse Skull From A Cow Skull
… Tie A Stopper Knot
Tie a stopper knot for the end of a rope, or a metal, rawhide, or plastic honda
… Tie A Stopper Knot For A Honda
Tie a stopper knot for a tied honda
… Understand Leather / Hide Thickness
… Weigh A Horse and Optimize Rider Weight
… Wrap A Saddle Horn With Rubber
You Might Also Like...